
Dryers are one of the most essential appliances in any home, but they can also be one of the most expensive to repair. If you’re handy, you can save money by doing some dryer repairs yourself.
Here are a few common DIY dryer repair projects:
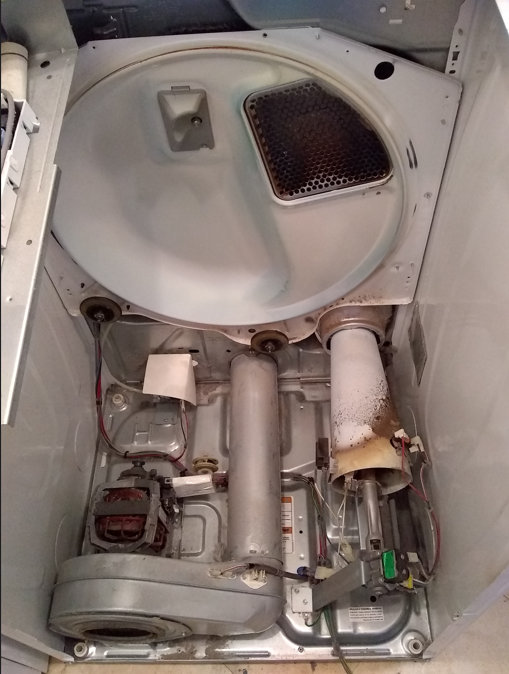
Replacing the dryer belt
The dryer belt is a rubber belt that connects the motor to the drum. If the belt is worn or broken, the drum will not spin and your clothes will not dry.
To replace the dryer belt, you will need a screwdriver, a wrench, and a new dryer belt. The belt is usually located at the back of the dryer.
- Disconnect the dryer from the power source.
- Remove the back panel of the dryer.
- Locate the dryer belt and remove it from the motor and drum.
- Install the new dryer belt on the motor and drum.
- Reattach the back panel of the dryer and reconnect the power source.
Cleaning the dryer vent hose
The dryer vent hose vents hot air and lint from the dryer to the outside. Over time, lint can build up in the hose and cause it to clog. A clogged dryer vent hose can cause the dryer to overheat and shut down, or it can increase the risk of a fire.
To clean the dryer vent hose, you will need a vacuum cleaner and a vent brush.
- Disconnect the dryer vent hose from the dryer and the outside vent termination point.
- Vacuum the inside of the hose to remove any lint.
- Use the vent brush to clean the inside of the hose.
- Reattach the dryer vent hose to the dryer and the outside vent termination point.
Replacing the dryer door switch
The dryer door switch is a switch that turns off the dryer when the door is opened. If the door switch is broken, the dryer may not start, or it may continue to run even when the door is open.
To replace the dryer door switch, you will need a screwdriver and a new dryer door switch. The door switch is usually located on the door frame of the dryer.
- Disconnect the dryer from the power source.
- Remove the dryer door.
- Locate the dryer door switch and remove it from the door frame.
- Install the new dryer door switch on the door frame.
- Reattach the dryer door and reconnect the power source.
If you are experiencing problems with your dryer, be sure to check these common issues. If you are unable to fix the problem yourself, call a professional repair technician.
Additional Tips
- Before starting any DIY dryer repair project, be sure to disconnect the dryer from the power source.
- Always wear safety glasses when working on dryers.
- If you are not comfortable working on dryers, call a professional repair technician.
- Keep a copy of your dryer’s owner’s manual on hand. The owner’s manual will provide instructions on how to disassemble and reassemble your dryer, as well as information on specific repairs.
By following these tips, you can safely and effectively complete common DIY dryer repair projects.